PC-wikimedia
Crazy paving, also known as flagstone laying or random paving, provides an elegant and eclectic way of designing external spaces. Crazy paving indulges in a combination of practicality and beauty, whether you need stylish pathways for your garden, a sophisticated patio, or just want to uplift the appeal of any outside area. Unlike conventional paving techniques, crazy paving involves stones of different sizes and shapes which help attain an appealing organic look. This is a guide that will ensure you step by step undergo the process of installing crazy paving in a manner that is pleasing to the eyes and durable at the same time.
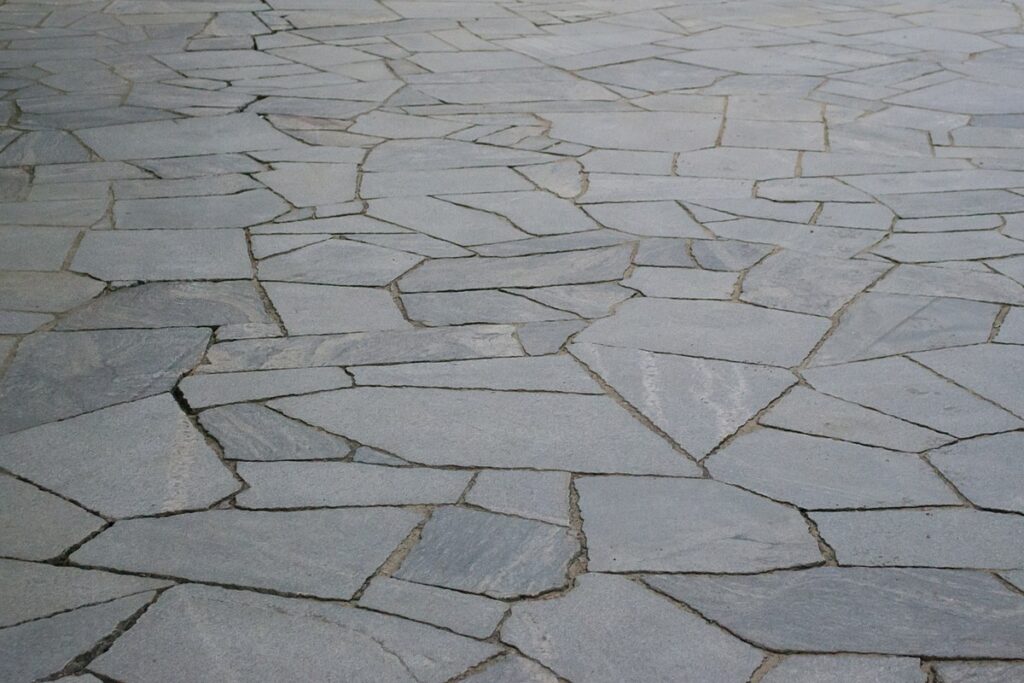
What Is Crazy Paving?
Crazy paving denotes the application of non-symmetrical shaped stones which are fitted together in a random way to obtain a continuous pattern. Many of these stones are made of natural stones, including sandstone, bluestone or limestone, which are arranged in a manner, such that the rough edges of the stones interlock, much like a jigsaw. The crazy paving style is not only charming but also offers the flexibility for creative design.
Why Choose Crazy Paving?
Crazy paving (CP) type options have several advantages when considering outdoor projects. Here are some of them:
• Unique Aesthetic Appeal: Crazy paving’s are always different, whatever the number of installations they are given. Their irregular layout of stones lends beauty to contemporary as well as ancient scenes.
• Durability: Done professionally, insane paving is able to support heavy pedestrian traffic and any condition.
• Eco-Friendly Solution: Because crazy paving utilises irregularly shaped stones that would typically go to waste, it can easily be considered sustainable.
• Low Maintenance: It is also beneficial as after the crazy paving is set in place very little aftercare is needed. This is ideal for homeowners, who would like to avoid unnecessary time, effort, and hassle.
Step-by-Step Guide to Installing Crazy Paving
For your crazy paving project to be successful, be sure to follow these steps:.
1. Plan Your Design Layout
Remember to design and draw your design in advance, which is the most important phase. When designing the sketch, estimate the size, shape, and arrangement of the stones. This provides you with an easy plan to work with and helps avoid any unnecessary costly mistakes.
2. Mark the Area
In order to delimit the area you intend to pave, bamboo, or metal stakes together with string. This is the reference frame in which each action is to be taken.
3. Excavate the Site
With the help of a shovel, clear the grass, roots and any loose debris from the perimeter to a depth of 15 cm. The aim of the excavation is to provide a space for the gravel and mortar base to which the structure will be anchored. Strong support will be essential here.
4. Secure the Perimeter
By fixing wooden pegs to the sides of the excavation, all four corners of the building will be reinforced. Setting these pegs one meter apart between themselves will build a timber frame that will take the load of the structure during the construction of the paving surface and to all future construction.
5. Prepare the Base
In order that the structure does not settle unevenly the coarse metal shovel is used to remove all loose stones and debris from the site, leaving a clean area.
6. Dry Lay the Stones
Stones should be laid down on the compacted gravel and dry-fitted prior to mortar application to get them where they want to be. In this step it is possible to properly adjust the position of the stones, in order that the articulations closest possible. Think of it as assembling a jigsaw puzzle—try to leave as few gaps as possible while achieving a natural appearance.
7. Lay the Stones with Mortar
Prepare the mortar in accordance with instructions on the bag. Begin by spreading a little more than a quarter of the mixture on the dry base. Next refine the region where you intend to lay the mortar in small segments. Follow the dry layout you have set up, pressing each stone into the mortar and levelling it. Clean any excess mortar as necessary.
8. Fill the Joints
After all the stones have been laid down, fill the gaps between them with mortar or jointing compound. Make use of a pointing trowel to firmly compact mortar in the joint. In this stage not only the paving is secured but also the level of aesthetic is advanced.
9. Clean and Finish
After curing of the mortar, wipe the stone surface with a damp sponge to detach any adhered mortar. Wait until paving is sufficiently hard to allow the recommended period for it to be walked on.
Tips for a Successful Crazy Paving Installation
• Choose the Right Stones: Pick some natural stones that go with the style of the outdoor space. Consider factors like color, texture, and thickness.
• Work in Small Sections: It allows a better control over the size of the stones and mortar pieces, as well as for the drying time of the mortar, thus offering a better control over mortar properties.
• Seal the Surface: After laying the paving it is advisable to coat with a sealant with the aim of preventing discoloration of the stones and to increase their aesthetic appeal.
Applications of Crazy Paving
Crazy paving is highly versatile and can be used in a variety of outdoor applications:.
• Garden Paths: Create elegant pathways that weave intersectionally throughout your garden or backyard.
• Patios: Design a unique patio space for entertaining or relaxing.
• Driveways: Give your driveway personality with a hard-wearing, striking surface.
• Pool Surrounds: For a natural, non-slip surface for your pool area, use crazy paving.
Conclusion
CRAZY PAVING is a good option for all those who want to improve their outdoor space with a solution that is different, as well as sturdy and easy to maintain. By following this guide, you are guaranteed to still be able to see your crazy paving project through and enhance your garden, patio or path with a magical new personality. From a rustic, natural feel to a sleek